MacPorts – MustHave

Web Site: http://www.macports.org

OS X is an UNIX OS.  The Aqua GUI is nice an all but in order to get the full potential of OS X, you should know how to work with the Terminal(xterm) and scripts.  Other free *NIXes have developed a nice package system and it is MacPorts that does package managements on OS X.

Requirement:
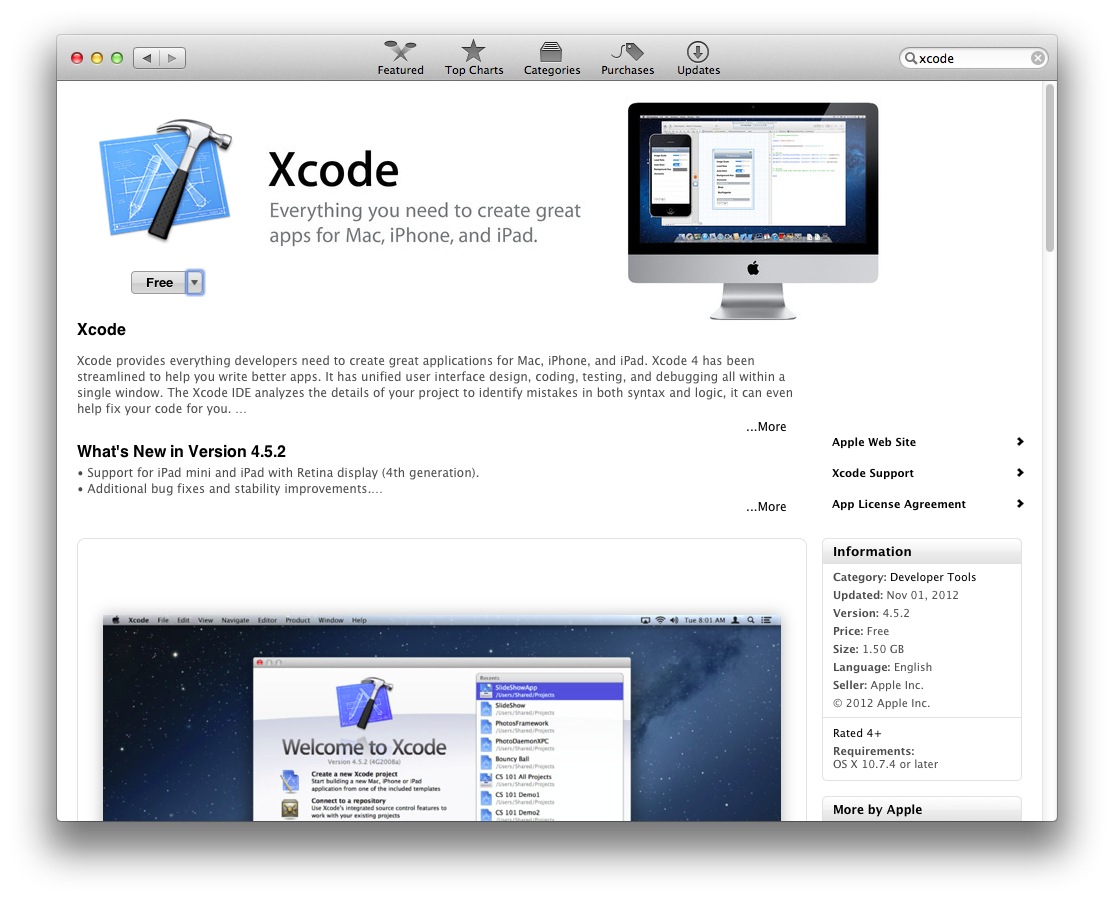
You need Apple Xcode Development Tools.  Get it from AppStore(Link):
AppleStore-Xcode

It is free!!!  After it is installed, you need to accept Xcode EULA by either running xcode or entering the following command in the Terminal:

% xcodebuild -license

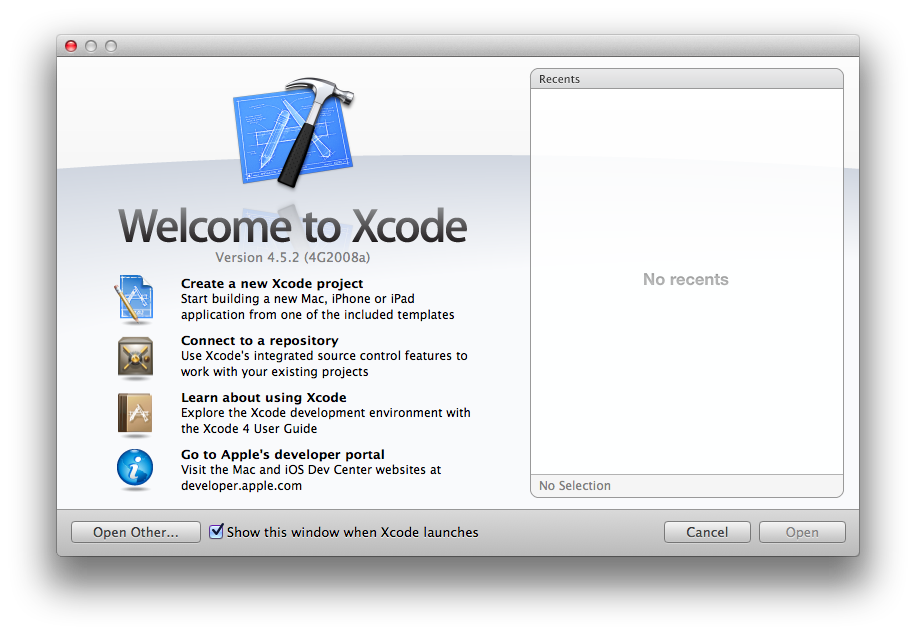
Go to Applications then double click on the Xcode so it gets installed on the system.

Xcode-Welcome

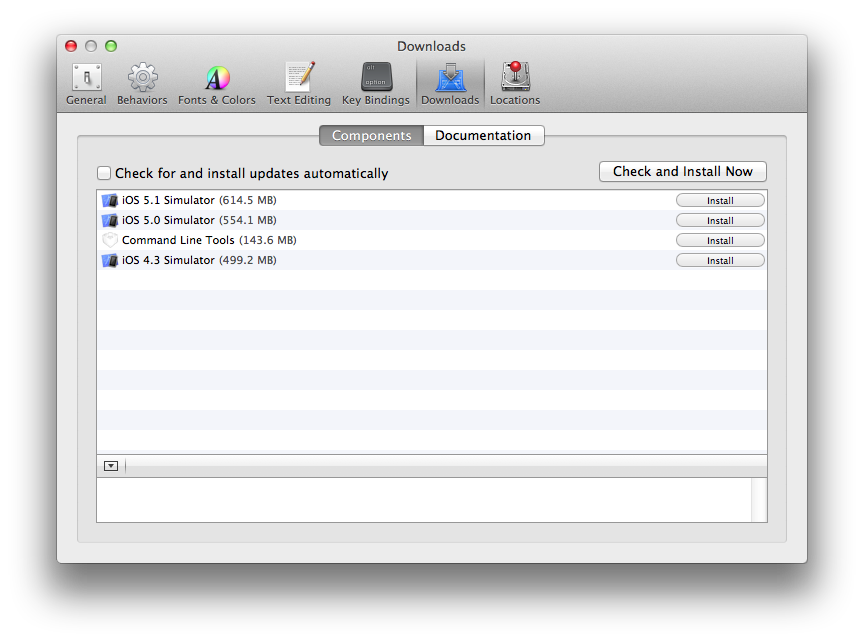
Now the Command Line Tools needs to be installed.  Go to Xcode->Preferences->Downloads:

Xcode-Pref-Downloads

Click on the “Install” button next the the Command Line Tools.


Now, MacPorts can be installed via .pkg/.dmg and the links are:
Mountain Lion: https://distfiles.macports.org/MacPorts/MacPorts-2.1.2-10.8-MountainLion.pkg
Lion: https://distfiles.macports.org/MacPorts/MacPorts-2.1.2-10.7-Lion.pkg
Snow Leopard: https://distfiles.macports.org/MacPorts/MacPorts-2.1.2-10.6-SnowLeopard.pkg
Leopard: https://distfiles.macports.org/MacPorts/MacPorts-2.1.2-10.5-Leopard.dmg

After downloading the .pkg/.dmg, simply double-click on it to get it installed.

Self update: in a Terminal type the following:

% sudo port -v selfupdate


x-rite i1 Display Pro Calibration – OSX

Manufacturer’s web site: http://www.xrite.com/product_overview.aspx?ID=1454

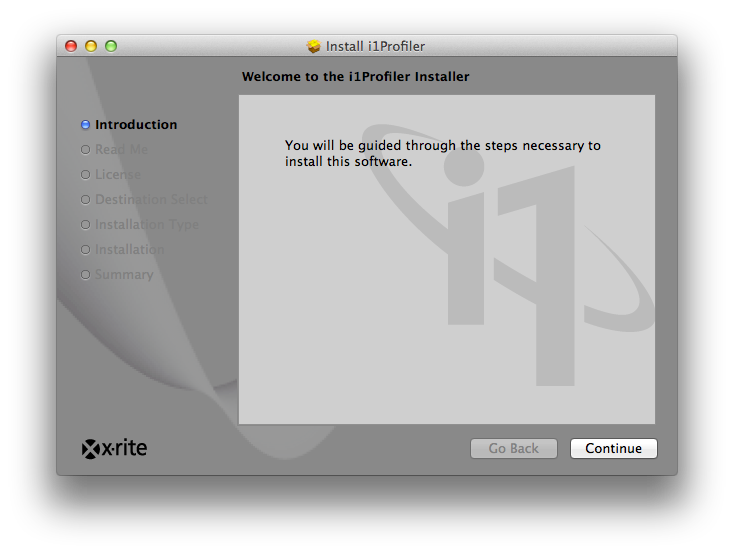
Forget the CD that comes with the calibrator, instead go to the manufacturer’s support page for the latest version of the software.  In this case http://www.xrite.com/product_overview.aspx?ID=1454&Action=support&SoftwareID=1164 – download i1Profiler_v131.mpkg(you want to save it as .zip file) and open up the Downloads folder in the finder and double click on it then it will unzip and create a i1Profiler.mpkg file for you, double click on the i1Profiler.mkpg.

i1Profiler-Install

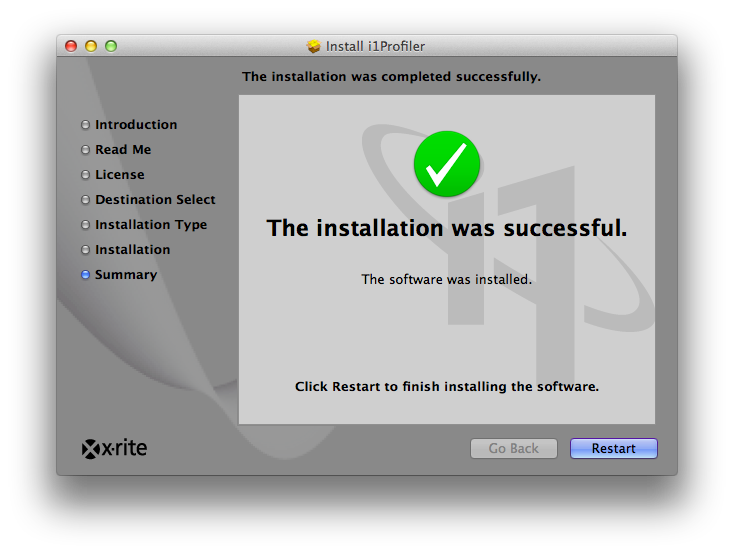
After installation is done, you must reboot the computer.

i1Profiler-InstallDone

After everything is done. go ahead and run “i1Profiler” Applications -> i1Profiler

From here on, it will be the same procedure as Windows : http://yootopia.com/mystory/wp/2013/01/05/x-rite-i1-display-pro-calibration-windows/


x-rite i1 Display Pro Calibration – Windows

Manufacturer’s web site: http://www.xrite.com/product_overview.aspx?ID=1454

Forget the CD that comes with the calibrator, instead go to the manufacturer’s support page for the latest version of the software.  In this case http://www.xrite.com/product_overview.aspx?ID=1454&Action=Support – download i1ProfilerSetup.exe and install it by double-clicking on the file.

After installation is done, you may need to reboot the computer.  After everything is done. go ahead and run “i1Profiler” from Start -> All Programs -> X-Rite – i1Profiler
i1Profiler-InitialScreen

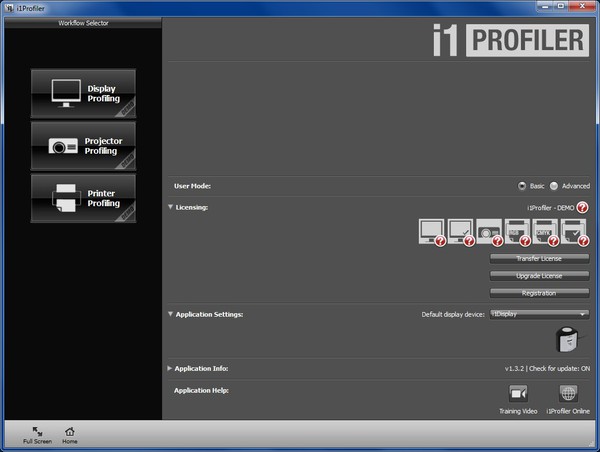
Notice that there is “DEMO” stripe on all of the Workflow on the left column – Display Profiling, Projector Profiling and Printer Profiling and also the question mark on all of the items under the Licensing section on the right side.

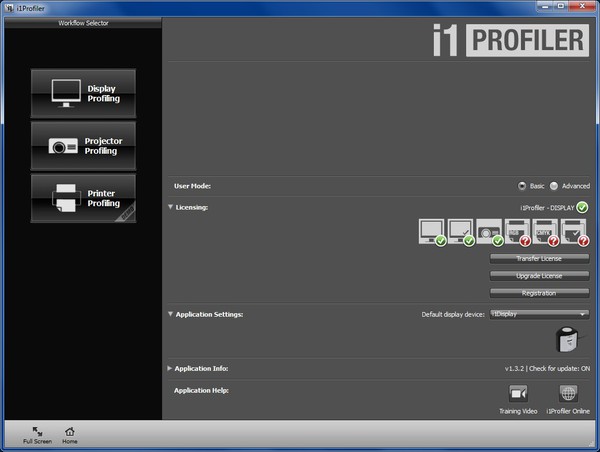
Now, go ahead and plug in the i1Display Calibrator to any available USB port then the “DEMO” stripe will be gone from Display Profiling and Projector Profiling and also both monitors and projector under the Licensing section are now with green check mark.
i1Profiler-Initial2

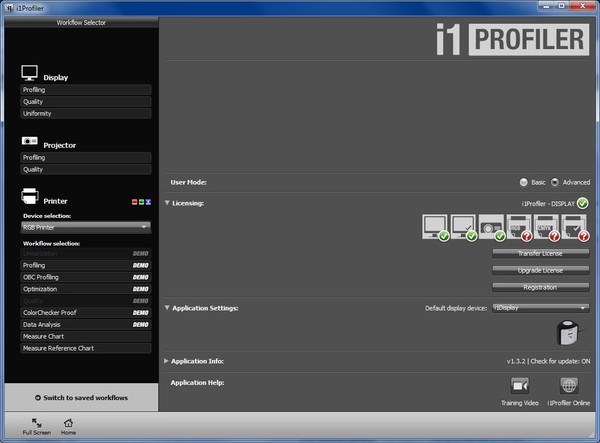
Let’s switch to “Advanced” mode : check on the “Advanced” radio button on “User Mode” on the right-hand column:
i1Profiler-Advanced

Under “Workflow” on the left-hand column, under “Display” section, click on “Profiling”
i1Profiling-Profiling

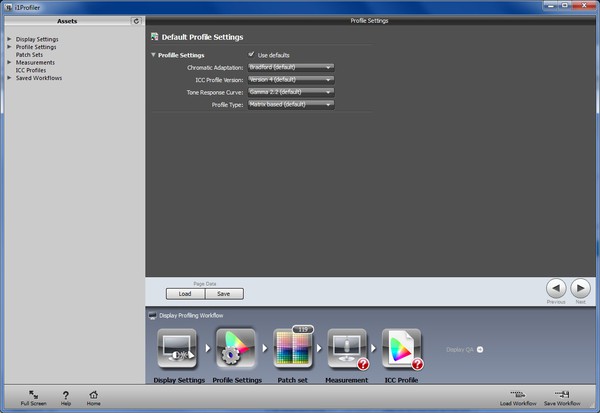
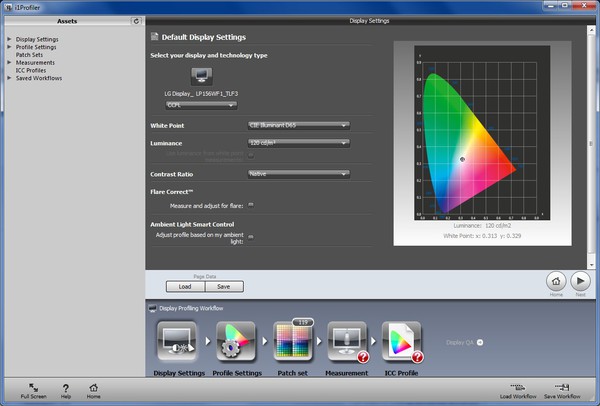
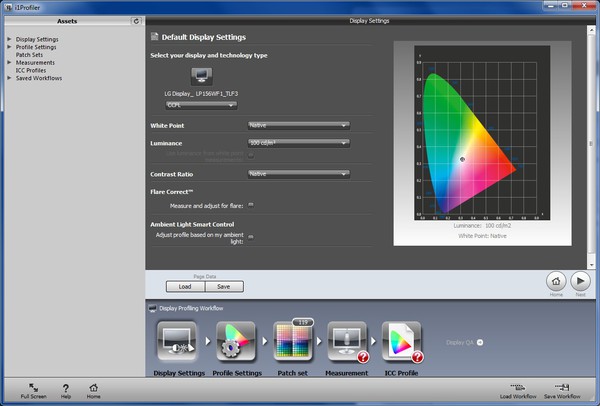
In the “Display Settings” on the right-hand side, change parameters as the flowing:
Default Display Settings: leave it as is, it probed what type of screen you have and selected the technology type automatically.  On my laptop, it knows that it is LP156WF1_TLF3 and selected CCFL for me, which is correct.

White Point: Native

Luminance: 100 cd/m2

Contrast Ratio: Native

Flare Correct: un-checked

Ambient Light Smart Control: un-checked
i1Profiling-options

Now, click on “Next” button.

i1Profiling-settings

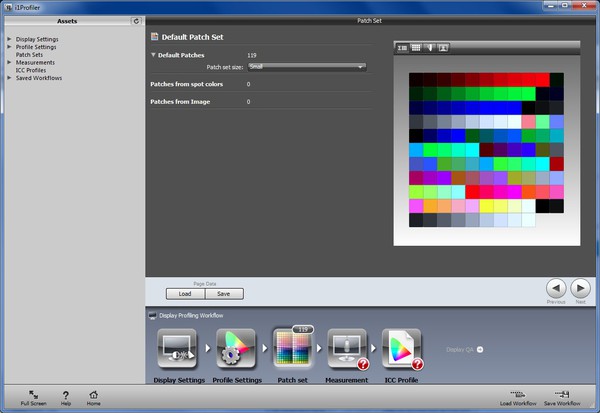
Click on “Next” button again:

i1Profiling-PatchSet

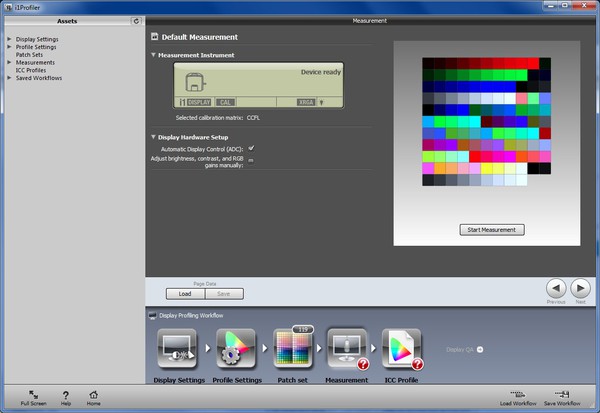
Click on the “Next” Button on to the “Measurement” screen:
i1Profiling-Measurement

Click on the “Start Measurement” square button under the color pallets:

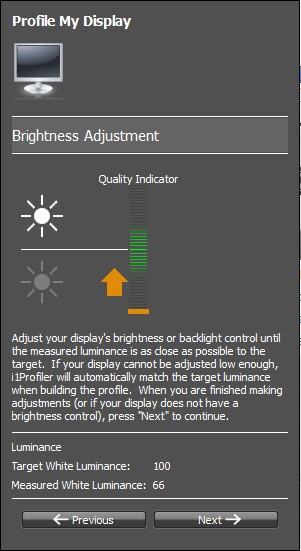
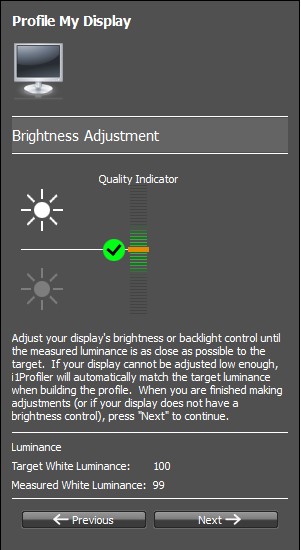
X-Rite’s Automatic Display Control(ADC) will try to adjust the luminance and contrast on your display.  Some of the monitors/laptops, this will work and it will automatically proceed onto the color measurements but if it cannot perform ADC, it will ask you to manually adjust the luminance and the following a few more steps are required.

Follow the instructions on the screen.
i1Profiling-measurements1

It will perform the Brightness Adjustment and shows the Luminance of your monitor, adjust your brightness so it will be as close as the Target White Luminance(100) then click on Next button.
i1Profiling-measurements2

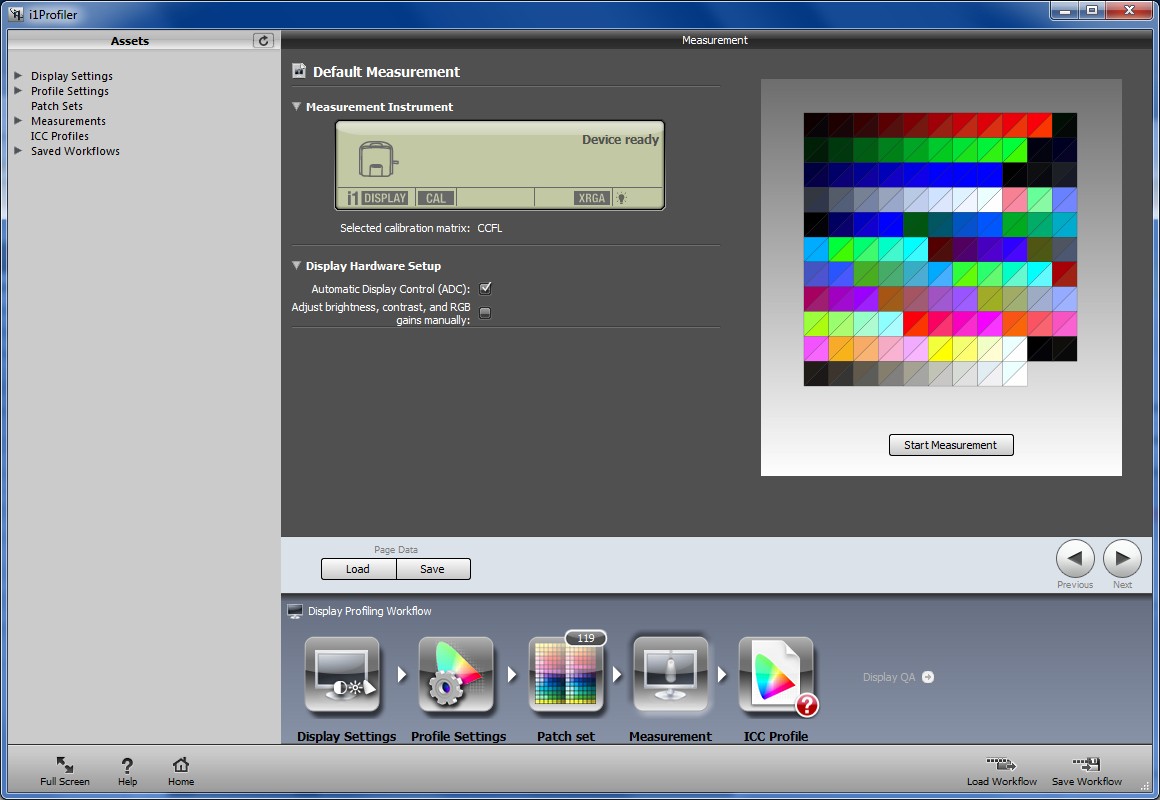
It will start displaying different colors with different shades to measure the display performance.  This will take a few minutes.

After the color measurements are done, it will perform the ambient light measurement.  Just follow the instructions on the screen.
i1Profiling-MeasurementDone

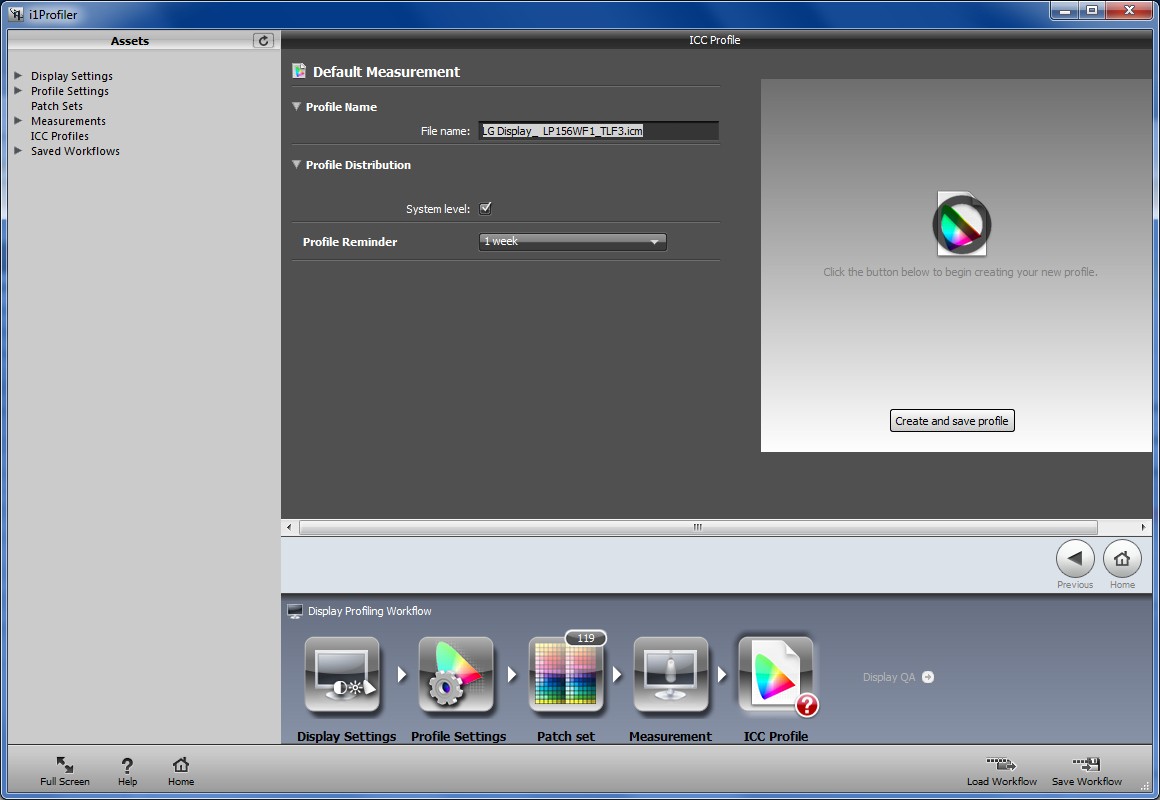
Click on the Next button and go onto the “ICC Profile” screen:
i1Profiler-ICCProfile

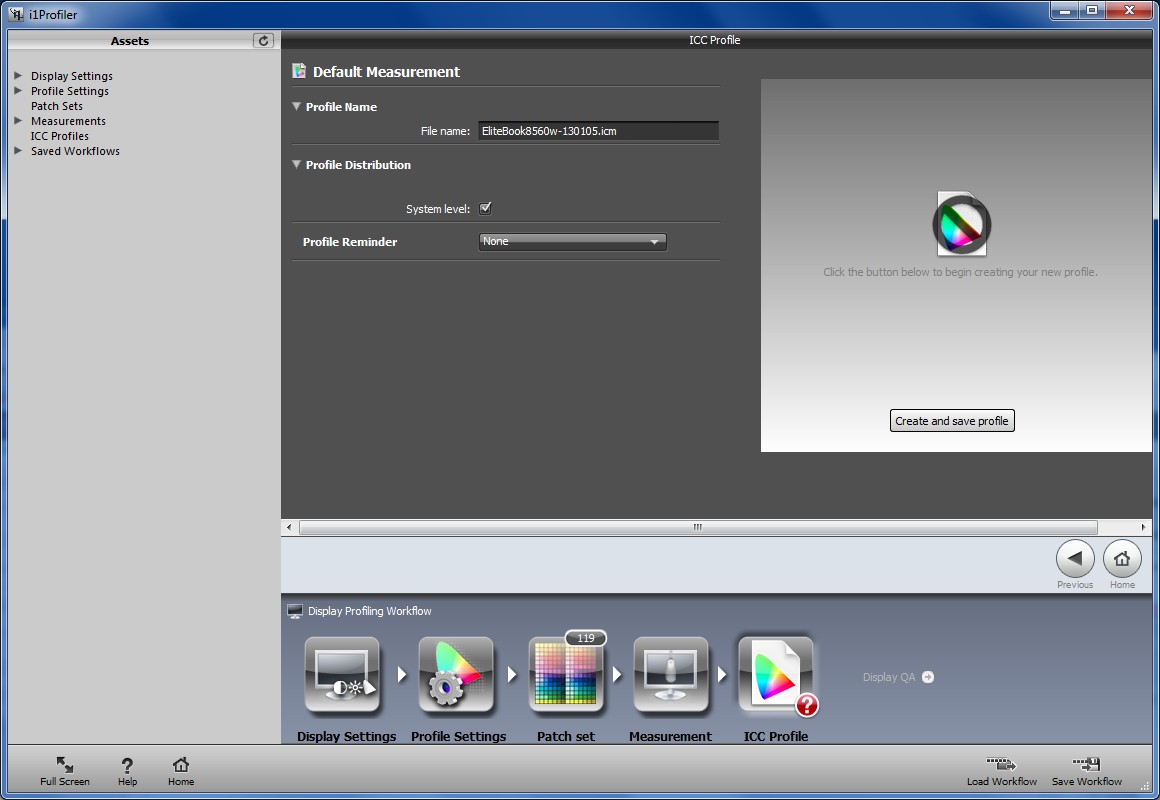
Here, we are going to give a name to the ICC Profile that was just measured.  In my case, it named it as “LG Display_  LP156WF1_TLF3.icm” which does not make much of a sense.  Let’s name it with model of the monitor with the today’s date so we know when this ICC Profile was created, e.g. “EliteBook8560w-130105.icm”

Choose “None” on the “Profile Reminder”
i1Profiler-ICCProfile2

Now, click on the “Create and save profile” square button on the right.
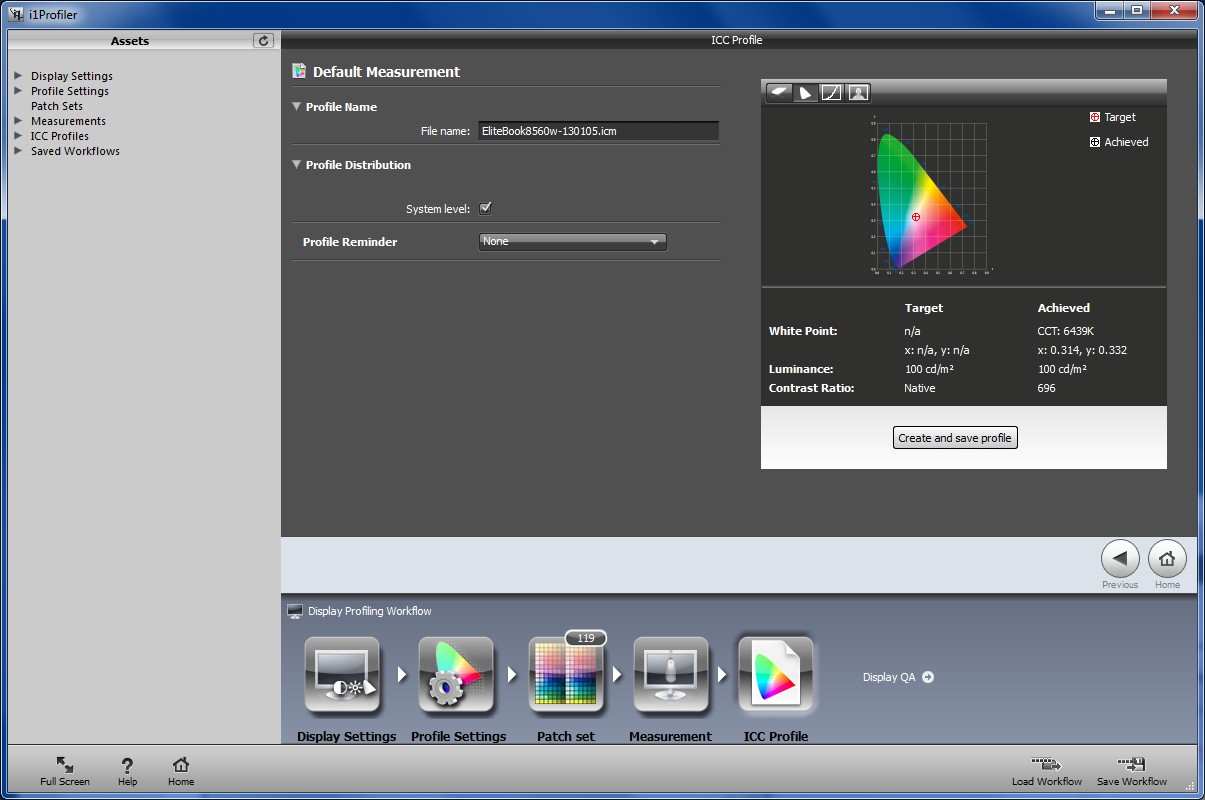
i1Profiler-Done

Now click on the “Home” button.

That’s it!!!  You are now successfully calibrated your monitor and created adjusted ICC Profile.


References:

http://people.csail.mit.edu/ericchan/dp/Epson3800/printworkflow.html#display_calibration
This is based on the previous model of X-rite/GretagMacbeth i1 Display 2 but worth to read.

http://dummyfactory.net/root_main/exposure/i1display2/i1display2.htm
Another very detailed article on X-rite/GretagMacbeth i1 Dispaly 2.

http://dummyfactory.net/root_main/exposure/exposure.htm
Reference on Datacolor Spyder 4 Elite.


Ripping CD and Converting to FLAC

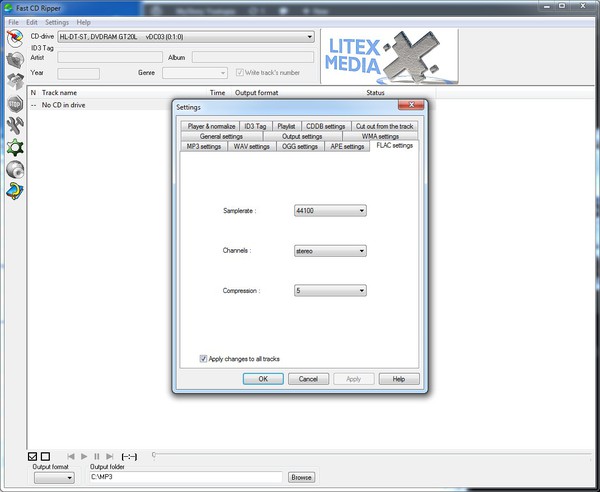
I want to store my CD collections in digital format and, of course, I want them in FLAC format!!!  Here is what I use to do that.

I use Fast CD Ripper and Mp3tag applications.

The CDDB info that Fast CD Ripper gets from the internet often(if not always) not enough so once all of the tracks are ripped into FLAC format, I run Mp3tag on them and fix the name of the files and the MP3tag in them.


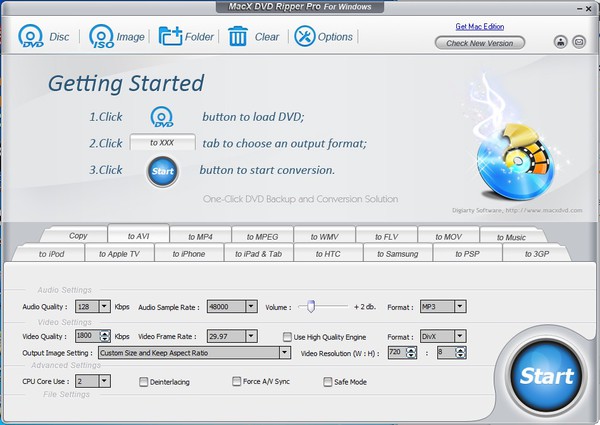
Fast CD Ripper

Fast CD Ripper

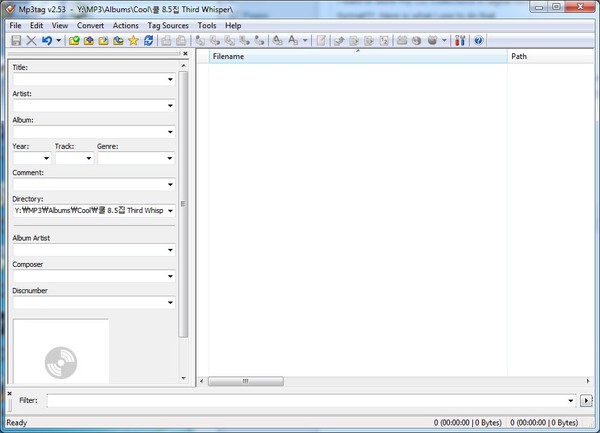
Mp3tag

Mp3tag

Screen Capture

For windows:

Darn “Print Screen” button does not work all the time and most of the time, I have to use Paint application and cut out the portion of the screen shot that I want… What a waste of time!  I did a 0.5 sec search and find the following two applications:

http://www.wisdom-soft.com/products/screenhunter_free.htm

http://screencapturer.com/


For now, I am sticking with Wisdom-soft ScreenHunter 6.0 Pro


For OSx:

OSx it is much easier and it actually works…

To capture the entire desktop: press Command-Shift-3. The screen shot will be automatically saved as a PNG file on your desktop.

To copy the entire desktop: press Command-Control-Shift-3. The screen shot will be placed on your clipboard for you to paste into another program.

To capture a portion of the desktop: press Command-Shift-4. A cross-hair cursor will appear and you can click and drag to select the area you wish to capture. When you release the mouse button, the screen shot will be automatically saved as a PNG file on your desktop. (The file is saved as PDF in Mac OS 10.3 and earlier.)

To capture a specific application window: press Command-Shift-4, then press the Spacebar. The cursor will change to a camera, and you can move it around the screen. As you move the cursor over an application window, the window will be highlighted. The entire window does not need to be visible for you to capture it. When you have the cursor over a window you want to capture, just click the mouse button and the screen shot will be saved as a PNG file on your desktop. (The file is saved as PDF in Mac OS 10.3 and earlier.)

Add Control to the two shortcuts above to place the screen shot on the clipboard instead of saving it to the desktop.

(source http://graphicssoft.about.com/od/screencapturemac/ht/macscreenshot.htm)

Zeiss Distagon 4/18mm ZM

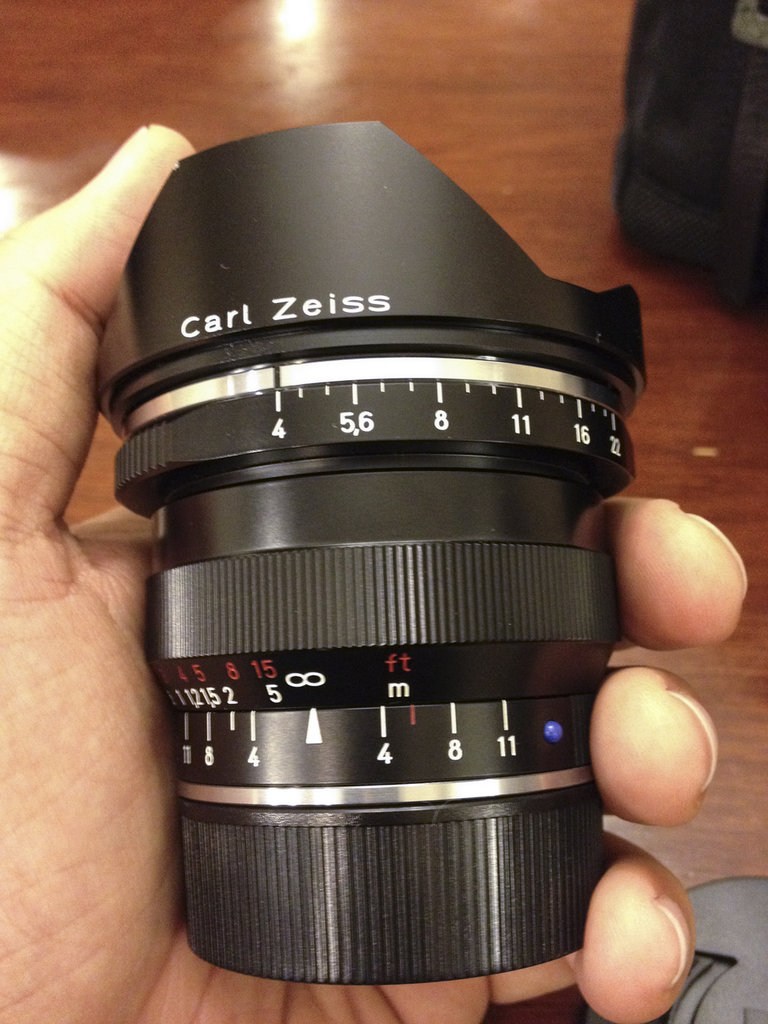
ZM18_01


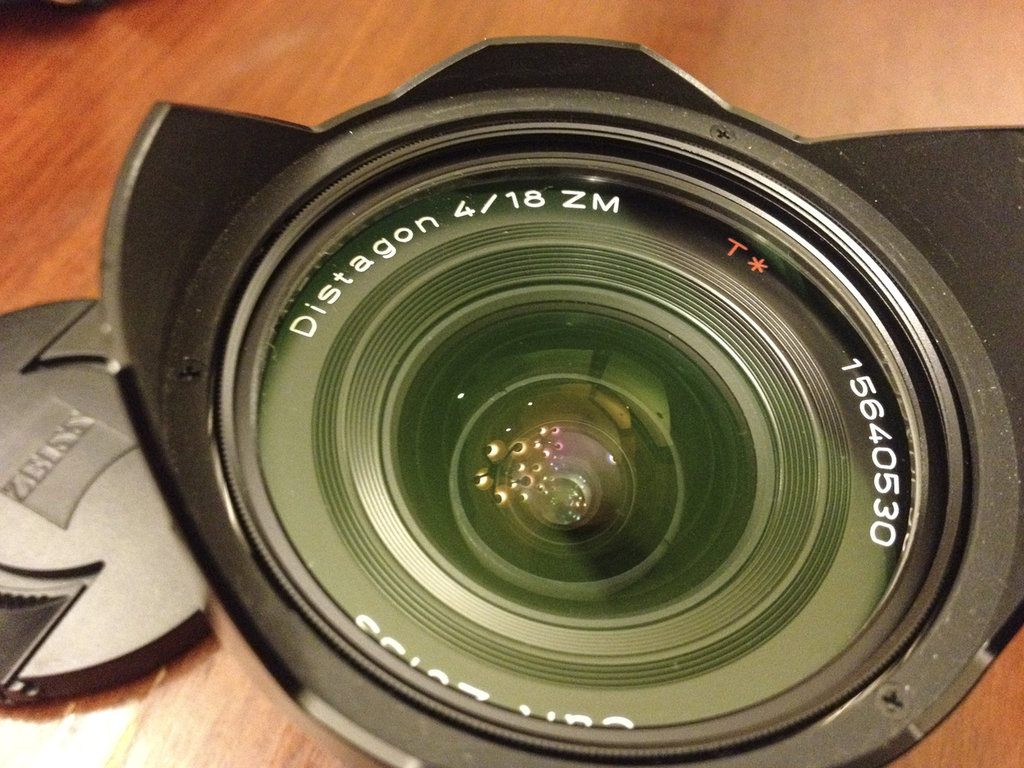
ZM18_02


ZM18_03


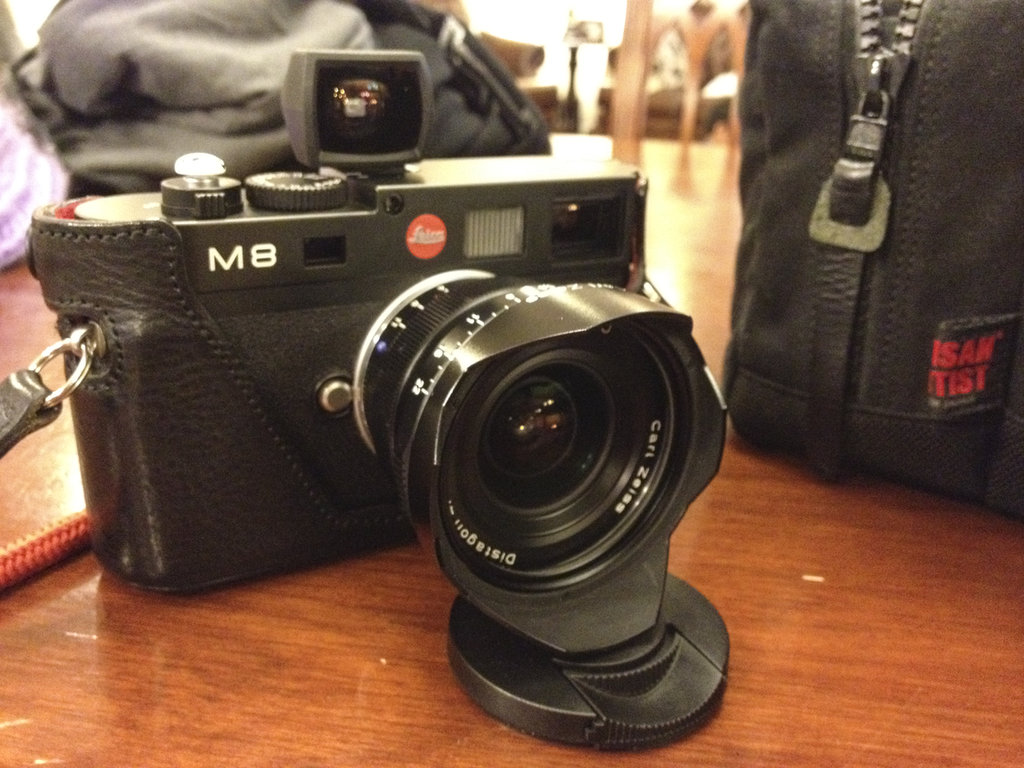
I really like Carl Zeiss… I used to own many ZM lenses but I ended up with Biogon 2.8/21 ZM but now I added Distagon 4/18 ZM!!!!  Leica Super-Elmar-M 18mm F/3.8 is awesome lens but it cost too much, I mean too much…  On the other hand, ZM 18mm is quite reasonable.  I only used ZM18 for a few times but I can already say that it will be in my camera bag for a while.  I am going to sell my old Voigtlander Heliar 15mm/f4.5M so I can cover some of the cost of this ZM18.

Carl Zeiss knows optics and ZM18 shows just that!!!

It is just an awesome lens.  The build quality of the lens itself is superb and the produced image from this lens is just awesome!!!!


Leica Summar 5cm F/2.0 Lens

LeicaSummar_01


LeicaSummar_02


LeicaSummar_03


Leica Summar 5cm F/2.0

I first thought that this was an older version of Summicron which is also F/2.0 but it turns out that this is very different than Summicron.  It is collapsible, Screw-mount, there is no “stops” in the aperture ring so it runs freely just like focus ring.  Either it has no coating or single-coating.  This copy has plenty of cleaning marks on the front lens element.

The best part is that I can attach this on a LTM adapter and use it on any M-mount cameras including M7/M8 !!!

As expected, it is weak at flares, smooth contrast yet sharp.  It would be very good for B&W shots but I also find that it works just fine on my M8 with color shots.

I am going to keep this one for a while and see how it captures the images for me….